Looking for inexpensive ways to keep baby warm in winter is an adventure!! Below find the pattern for a simple two layer blanket that keeps you and baby warm, warm, warm!! Several of us drove to the Fabric District in Downtown Los Angeles to check out supplies for these blankets. Any large city will have a place like this where you can find amazing deals on your needs. We found everything from polyester based yardage to 100 percent cotton French Fleece. The prices vary as to how much yardage you are interested in purchasing. Merchants love to haggle, so go with the intent of getting the best deal. Go to several different vendors, comparing quality & cost of wares, and the attitude of the owner. Plan to have fun!
Please let me know your questions and finds!!!
JUDY
Introduction: No Sew Fleece Blanket.
No Sew Fleece Blanket

Choose a print and a contrasting or matching solid. I like to use strong, bold contrasts. You will need a solid and a print that are the same size. My sample uses a nice dark hunter green for the back.
Step 2: Line Up the Two Fabric Pieces.
Line up the two fabrics, right sides OUT. Anti-pill solids are FUZZY on the right side. Anti-pill prints will be more distinct on the front side. Regular prints are hard to tell — use the side that appeals to you.

Step 3: Trim to the Same Size.

Trim the two pieces so that they are the same size.
Step 4: Cut Out the Corners

Cut a 5-inch square from each of the four corners.
Step 5: Cutting the Fringe
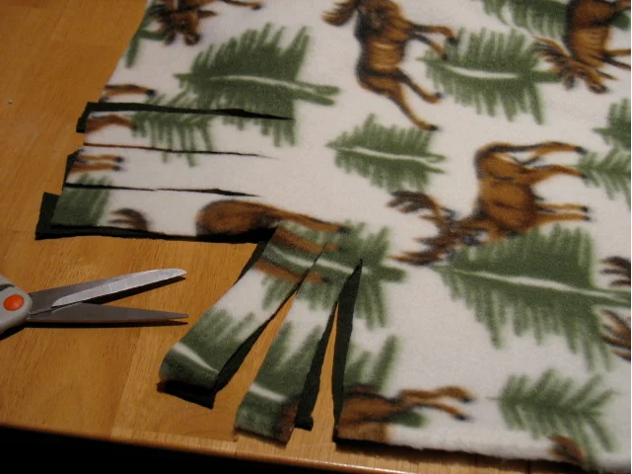
Cut fringe on all four sides of the blanket. Cut through both layers of fabric at the same time. Fringe pieces should be a little wider than the width of your finger. Cut in from the edge 5 inches. I like to lay a yard-stick across the fabric, 5 inches from the edge so that I know how far in to make my cut.
Step 6: Begin Tying Knots


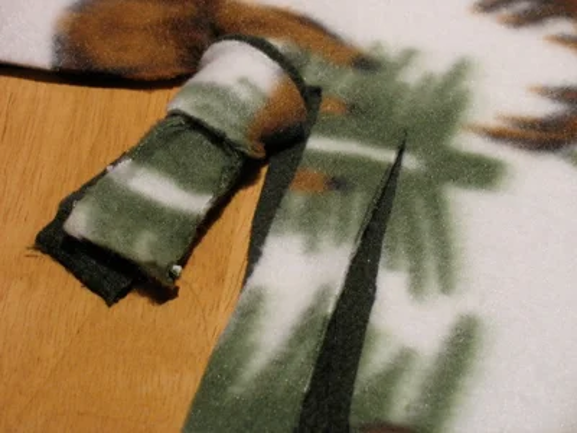
Leave your blanket laying flat on the surface, with all fringes lined up. I find it easier to start tying from the left and work right, going around the blanket. If you are left-handed, you may find it easier to start on the right and work left. These knots are called balloon knots… tie them just like you would if tying off a balloon! You can also tie a knot like you would make with a shoe lace. That kind of knot will be easier if your hands are arthritic.
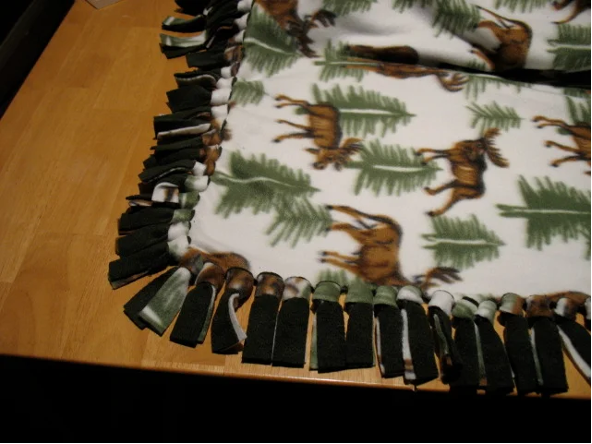
Step 7: Continue Around the Blanket
